Showing posts with label Beauty. Show all posts

October 19, 2015

6 Makeup Brushes for a Flawless Face

I cannot emphasize the importance of having good brushes in your makeup drawer. I mean, hello, you will be using them every. single. time. you apply your makeup. This is the starting point to a flawless face. Good quality brushes will give you that seamless finish you've been dying for. 

"YOU CANNOT ACHIEVE GOOD MAKEUP
WITHOUT GOOD TOOLS"
- François Nars

Unfortunately, there is not a "one size fits all" brush for makeup. Each brush is designed for a specific function and has unique properties such as density, size, shape, length of the bristles, etc. Shopping for makeup brushes can be very overwhelming (and expensive!), so here's a little advice to help you along the way...

6 makeup brushes for a flawless face
Model: Olivia Gochnour; Image by Liz Pinckney

FAQ: How to I know a good quality brush is from a bad quality brush?
The first way to distinguish between a good- and a poor-quality brush is by feeling it. Are the bristles soft? Is the brush easy to hold and maneuver in your hand? Are the bristles natural or synthetic? You get what you pay for. Good quality brushes are usually more pricey and can be found at department stores. Synthetic brushes are a lot less expensive; however they don't last as long and tend to lose bristles. These brushes are usually found at drug stores.


FOUNDATION BRUSH

Foundation brushes are my all time favorite as far as soft brushes go. There are many alternatives to foundation brushes (i.e. clean fingers, sponges, etc.) I'm in love with THIS foundation brush; however, I've been using THIS sponge a lot lately.


CONCEALER BRUSH
Concealer brushes are very very dense because they are used to cover dark spots, acne scars, and blemishes. (dense bristles = fuller coverage). I use THIS brush for concealer. THIS is also a great concealer brush that is not as pricey.


BROW BRUSH
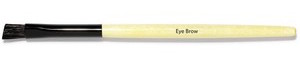
Brow brushes have shorter bristles. My all time favorite eyebrow brush is THIS one because it has dual purpose functionality; One side has the angled bristles for applying eyebrow powder, and the other side has stiff 180-degree bristles for blending. 

BRONZER BRUSH

Bronzer brushes are big and dense. Their long bristles are able to pick up lots of powder. I've been eyeing THIS (beautiful) brush; However, a less expensive alternative is THIS is one.

BLUSH BRUSH


Blush brushes are much smaller than a bronzer brush, they're just the perfect size to cover the apples of your cheeks. The brush I'm using right now is decades old, and I wasn't able to find it anywhere online; However, I'm tempted to try THIS one out.


BLENDER BRUSH
I like applying a finishing powder when I'm done with my makeup to help with blending and to set everything.  THIS big, fluffy brush is perfect for that. The long soft bristles pick up loose powder and lightly distribute it everywhere. 


Already have makeup brushes you love?
Well, perhaps it's time to clean them. Makeup brushes should be cleaned at least once a month in order to remove any old makeup, oils, dead skin cells, and bacteria. Using a dirty brush to apply your makeup can cause breakouts. I clean my makeup brushes using THIS gentle cleanser and water.

SEE ALSO: Sara's Must-Have Beauty Products

Thanks for reading!
xo,
Sara

October 15, 2015

Braids in the Backyard + Sara's Guide to Healthy Hair

8 Tips For Healthy Hair + Braid Inspiration!

I love the power of h a i r. 

I love the confidence, creativity, and identity that comes from hair. 

I love looking through old photos and instantly recognizing when the picture was taken based on the hair trends. 

I love the thrill new hair gives an individual, from something as simple as a new braid to a bold cut and color.

I love unity that is created over hair. I remember countless summer nights at girls camp, when we would sit around the camp fire and braid each others hair.

"LIFE IS TOO SHORT TO HAVE BORING HAIR"

Healthy hair is the best hair. I've listed eight simple tips below for healthy hair... 

8 Tips For Healthy Hair + Braid Inspiration!

1. Embrace Your Locks. 
The phrase 'the grass always seems greener on the other side', applies to hair. Everybody's hair is different-- long, short, straight, curly --whatever type your hair is, own it.

2. Invest Time to Find Your Killer Stylist. 
I love my hair stylist, I love bouncing ideas off her about different haircuts or potentially coloring my hair. I trust her judgement; she knows what will work with my face shape and what will not. She knows how my hair will look if I wanted to go lighter and how it will hold color.

3. Ditch the Heat. 
Give your hair a break from the heat by trying some hairstyles that don't require heating tools. This is especially important if you're in the process of growing your hair out. Braids are great for this. Or go au-naturale and let your hair air-dry!

4. Give Your Hair a Break. 
Another thing you want to give your hair a break from is shampoo. Washing your hair too often may strip out natural oils causing your hair to dry out and appear less silky. If you're washing your hair every day, try ditching the shampoo and simply rinsing every other day. THIS is what I use in between washes to keep my hair looking fresh. Another (less expensive) alternative is THIS.

8 Tips For Healthy Hair + Braid Inspiration!8 Tips For Healthy Hair + Braid Inspiration!
8 Tips For Healthy Hair + Braid Inspiration!

5. Eat Your Vitamins! 
Healthy hair starts from the nutrients you're putting in your body. Some of the best vitamins for healthy hair include: Biotin (found in brown rice, lentils and oats), Vitamin A (found in spinach, carrots and peaches), and Vitamin E (found in soybeans, leafy greens and nuts).

6. Trim Your Hair Regularly.
Hair should be trimmed every 6-8 weeks. If you're growing your hair out, trim every 10-14 weeks. This will not only cut off split ends, but also keep your hair from looking thin and straggly at the ends. 

7. Get Familiar with Styling Products.  
Hair products can help add that extra texture and hold you're looking for. This can be especially helpful on 'bad hair days' when your hair has a mind of its own. Get familiar with what hair products work best for you. Some of my favorite hair products are HERE, HERE, and HERE.

8. Relax and Have Fun. 
At the end of the day, hair is hair is hair is hair. If you cut your hair too short, it will eventually grow back. Or if you're frustrated that you can't quite perfect that hairstyle you've been working on, there's always tomorrow. Be patient, and remember to have fun.

8 Tips For Healthy Hair + Braid Inspiration!

Big thanks to my darling models Kelsey, Jacquelyn, Katelyn, and Annie. 
Also, to my cousin Arden for helping out with hair! xoxo

Thanks for reading,
Sara

October 08, 2015

Sara's Must-Have Beauty Products

Time for another round-up of my favorite beauty products!! (See last one HERE). My beauty routine changes depending on the season/latest makeup trends so I figured I'd give an update and share the latest additions to my makeup stash. Drumroll please....

Must-have beauty products for every girl


STILL USING (and loving)...

1.  MAC's "Peaches" Blush. I can't seem to pull away from this color. Yes, I've tried other brands as well as other colors but this is my holy grail. It looks good on just about every single skin tone out there and adds the perfect amount of warmth. 

2. Yves Saint Laurent Highlighter. This is what I use on my dark under-eye circles. I love it's light consistency. It's easy to build on without looking heavy. (Please, if you're using concealer under your eyes- stop!! This is where it's at.)

3. Anastasia's Eyebrow Powder Duo. Does this even need an introduction? I can't go a day without filling my brows in with this powder.


ADDITIONS....

1. The Beauty Blender. I'm in luh-luh-love with this little guy. I used to use a foundation brush to put on my make-up but switched over to a damp beauty blender. I'm in love with the seamless, flawless finish this gives. I brought this on our trip to Europe and it was a life-saver. Most of the places we stayed at didn't have ideal lighting for make-up so I wasn't able to notice details (i.e. streaky make-up, uneven coverage) like I would back at home. I did not have any issues when it came to foundation thanks to this! The only downfall is it's a sponge and sponges tend to absorb quite a bit of my make-up before it even hits my face. I'm still using it though because I love the finish it gives, but that's definitely something to keep in mind before you run out the door to buy one. 

2. Anastasia's Contouring Kit. I love the look of a well-contoured face so I decided to tackle creating a perfectly-sculpted-Kim-Kardashian highlight/countering routine. I've contoured a little bit before using THIS (which I still use and love), but I wanted to step up my contouring game and this allowed me to do just that. It comes with six different shades- three highlighters, and three darker shades for contouring.   

3. MAC's Pro Longwear Pressed Powder. This is my right-hand powder whenever I'm on-the-go. If I don't have time to get ready (i.e. < 3 minutes), this is what I use for coverage on my face. It's easy to build on this powder so you can get anywhere from minimal to medium coverage with this. If you're looking for a quick and dirty make-up routine, this is a good place to start. 
Thanks for reading!

xo,
Sara

July 29, 2015

The Anti-Flower Crown

The Anti-Flower Crown. Wedding hair inspiration <3The Anti-Flower Crown. Wedding hair inspiration <3
The Anti-Flower Crown. Wedding hair inspiration <3

I've got great sister-in-laws. Last night we decided to get together to play around with hair and start executing last-minute details for An Ode To Summer, (hope you all are coming!) We stole a little inspiration from Tinge Floral, one of our lovely sponsors for the event, who started the hashtag #theantiflowercrown. It's been a crazy week but I'm looking forward to seeing you all there! Who knows, this may become an annual summer tradition.... We'll see ;)

Hair: Kara Covey
Flowers: Madalyn Louise

July 22, 2015

Bold Brows: Creating Your Perfect Brow

Eyebrow Tutorial. every girl needs to read this!
I started waxing my unruly unibrow in sixth grade for my 12th birthday. Yes, I had a unibrow. I hated it at the time, but I'm grateful that I have so much brow to work with now. Since then, I've studied, experimented, over plucked, and grown out my brows dozens of times. I've learned quite a bit along the way. Things to avoid and things that have become an absolute must. 

Never underestimate the power of a bold brow. 

Eyebrows are key to framing your bone structure and drawing out your eyes. Here's my advice to those looking to find their perfect brow:

1. Grow your eyebrows out. This is the worst part of the process, but it makes all the difference. The more hair you have to work with, the merrier, so avoid the temptation to pluck any hair. 

Let me repeat that... do not pluck ANY hair.

Eyebrow Tutorial. every girl needs to read this!

2. Schedule an appointment with a trusted brow technician. Let your brow tech determine your best shape. You have gotten used to looking at the eyebrows you've sculpted, but that doesn't mean its what looks best for somebody meeting you for the first time. Don't get trapped in the mindset thinking you know what's best. Your eyebrow tech will have a fresh perspective and know what to wax and what to leave to bring out your bone structure. Too often I see women who unknowingly have over-plucked their brows. This is no bueno. 

- FAQ: Waxing vs. Threading- which do you recommend? -
I have a strong preference towards waxing. There was a period of time when I had my brows threaded and came out with brows that were too thin. I even went in with pictures of thick brows and it didn't seem to help. I don't know if it's just a style that comes with threading or if there's less control, but I haven't had that problem with waxing.

Eyebrow Tutorial. every girl needs to read this!

3. Tint and/or fill your eyebrows. 
I already have dark, thick brows but even I fill them in. There are NO EXCEPTIONS to this rule people! Now whether you choose to tint or not is optional. I love having my brows tinted but it gets pricey so I only do it occasionally. Filling your brows in will give an almost identical result. the con: you will have to fill the in every morning. It takes me no longer than five minutes to fill my brows in though, which is nothing. THIS is my all-time favorite eyebrow filler. It comes in tons of different shades so if you're a blondie worried about having brows that are too dark, there's a shade for you as well ;) 

I'll usually fill in my entire brow then blend generously to give it a natural finish- nothing worse than brows that are *clearly* penciled in. If you have wild eyebrows, finish off with THIS GEL to hold them in place. 

Hope this helps!

*Images by Lizzy Pinckney
*Make-up by Devan Ampuero
*Jewelry: Layered and Long (c/o)

Eyebrow Tutorial. every girl needs to read this!


July 06, 2015

5 Best Sunless Tanners

I love the look of healthy tan skin. I feel more confident, radiant, and young. I *cringe* looking back at some of my high school pictures. There was one period I went way overboard with the tanning and at one point had orange skin. Since I've started college, I've ended my unhealthy relationship with the tanning bed (phew!). I'm not entirely sure why it took so long for me to realize all the negative side effects of UV-rays, and I can't pinpoint a specific moment when it all sunk in, but thank goodness it finally did!

Outfit details:

Even though I haven't been in a tanning bed since high school, I still am in love with the glow a good tan gives you. I've been experimenting with healthier ways that give me that same golden glow I would get from a moderate dose of UV-rays. I've gotten a few spray-on tans, some of which turned my skin orangey, others turned out flawless. But as far as DIY tanners go- these ones are the best ones out there!

1. Clarins Self Tanning Milk. This self tanner is my #1 fav! I love the results and texture of the lotion. It gives my olive skin the perfect sun-kissed look I love.

2. Lancôme Self Tanning Body Lotion. This one is very similar to Clarin's, however I don't like it as much because it can give you a streaky result if you're not careful.

3. Dr. Dennis Gross Self Tanning Wipes. I love the convenience of using self tanning wipes. They're individually wrapped so you can take them on the go, and they're not as messy as lotions.

4. La Mer Face & Body Gradual Tan Lotion. This is great if you want to build up your tan. Since it's a gradual tan lotion, there won't be any problems with streaking. It also smells great! It is kinda pricy though which is why it's not my favorite.

5. Whish Self Tanning Body Butter. I love the coconut smell of this self tanner. It's gives a great color and does a fabulous job at giving your skin enough moisture throughout the day.


A few tips & tricks when applying self tanners...
  • Exfoliate your skin before applying tanner for the first time
  • Moisturize dry areas (i.e. knuckles, elbows, ankles, etc.) and palms of your hands before applying tanner
  • Be sure to pick a self tanner that suits your skin type. If you have fair skin, don't be buying a heavy self tanner!
  • Only apply a very thin layer to your hands + feet  

P.S. THIS is my all-time favorite sunscreen. I put it on my face every morning before my make-up and it smells so yummy! It's a nice matte moisturizer so it doesn't make my face shiny or sticky like a lot of other sunscreens do.

Thanks for reading!

xo,
Sara

June 19, 2015

Fab Friday Finds: Donna Karan Cashmere Deodorant

Hello ladies and HAPPY FRIDAY!

I've decided to do us ALL a favor and branch out from the traditional grocery store deodorant and see what's out there because frankly, I've tried them all and they're no bueno. 


the smell wears off quick, 
they don't prevent sweat from seeping through, 
and they stain white shirts. 

I've seen Donna Karan's deodorant before at department stores as well as beauty salons and I've decided to give it a try...


I've put this deodorant to the TEST and so far I'm loving it. I've gone three days without showering and this stuff is able to mask any trace of stinky pits. (TMI?) I notice a significant difference between this stuff and the deodorant I was wearing beforehand. There's no way I'm going back. This is a total game changer.

Have you tried this deodorant?
If so, I want to hear what you think of it!

As always, thanks for reading!!

xo,
Sara

June 08, 2015

Summer Nails: Picking the Right Shade for Your Skin Tone

Nail polish has always been my JAM. I have a massive collection that I've acquired over the years. Sundays were always my "nail day," when I would remove last week's color and paint on a fresh coat for the upcoming week. It's the perfect accessory- whether it's a subtle pink or bright cobalt blue. I loved painting my nails, my friends nails, my mom's nails, my cousins nails, etc. 

I've noticed that one color looks different from one person to the next, depending on their skin tone. I remember painting a really pretty pink on my friends nails, then trying the same color my own nails and hating how it looked. Certain colors compliment your skin tone, while others colors... not so much. Here are a few observations I've made over the years when it comes to selecting a nail polish color for your skin tone: 


COOL UNDERTONES (people with cool undertones will burn quickly in the sun. eye colors tend to be blue or green. silver jewelry looks better against your skin than gold.)

These colors look best on you... white, blues, lavender, greys, greens, purples, silver, mint

Avoid wearing... red, light pink, orange, yellow
WARM UNDERTONES (people with warmer undertones will usually tan in the sun. eye colors tend to be brown or hazel. gold jewelry looks better than silver against your skin. I definitely fit in this category.)

These colors look best on you... coral, oranges, berry reds, off-white, browns, gold, pinks, copper

Avoid wearing... green, blue, steel, purple
Of course, these are not hard rules to live by. The idea behind it is that nail polish with cool undertones will compliment warm skin tones, and vice-versa. :) Experiment with different nail colors to see what you like best because in the end, you'll be the one looking at it all day! 

Thanks for reading!
xo,
Sar

May 29, 2015

Fab Friday Finds: PMD Pro

Hello beauty babes!

I've talked about the importance of getting the right vitamins for your skin, but sometimes a good diet isn't enough. I've had my eye on the PMD lately and finally decided to buckle down and spend the money. I figured that it's cheaper than getting a micro and I was crossing my fingers that it would help with trouble areas on my face (my poor nose loves to collect blackheads...ugh).

Take charge of your skin: PMD Pro. Need to try this! #simplyhued

For those of you who haven't heard of the PMD- it's a hand-held machine that serves as an at-home Microderm. It's like a tiny vacuum that removes the top layer of your skin in order to speed up skin cell renewal/turnover.

It also helps with...
- acne scars
- skin discoloration
- large pores
- blackheads
- fine lines/wrinkles
(sounds awesome, right?)

I've logged my overall experience below...

Week One:

5/13
I used the PMD Pro the very fist time tonight. I ended up just using the tester head on low speed and found it to be enough. I'm surprised how much suction the PMD Pro has. It took no longer than 30 minutes to complete my entire face. I can't see a visible difference, however my face is sensitive- it almost feels like a light sunburn. I could see my dead skin flakes in the lid so I know it's doing something-- I'm eager to see how it looks in the morning. 

5/16
A small area on my chin has started scabbing where I was too aggressive with the PMD Pro. (Rookie mistake.) Note to self: take it easy. I underestimated the power of this thing. 

Week Two:

5/19
Tried the PMD Pro for the second time tonight (again, with the tester head on low speed). It didn't take as long as it took the first time- I'm guessing because I'm more familiar with using the tool. This time I followed up with toner + moisturizer. My face is feeling incredibly soft and not sensitive like last time. 

5/21
I have not yet noticed a visible difference with my skin, however it feels softer and is much easier to work with. My moisturizer + foundation go on a lot smoother and hold stronger throughout the day. I haven't had any scabbing or red areas like last time.

Week Three:

4/25
My skin is looking a lot better than when I first started this. I feel like my skin has toughened up enough to move up a level on the PMD Pro. (I've just been using the tester head, but I plan on moving up to the beginner head next time.) The pores on my nose are noticeably smaller- even my little brother noticed a difference. 

PMD Pro. I need this!!

P.S. I bought my PMD Pro HERE

Do you use the PMD/PMD Pro?
I want to hear how you're liking it!

May 15, 2015

Fab Friday Finds: Giorgio Armani Foundation

Hello beauties!!

Today's Fab Friday Find is all about FOUNDATION. I started playing around with make-up in junior high school, and although I wore WAY too much for a young teenager, it's given me plenty of time to learn and discover new products. I've tried just about any and every brand and type of foundation. I've jumped from brand to brand trying to find the foundation that looked just right on my skin and wore well throughout the day.

^^my cutie model, Olivia.

Over a year ago, I discovered Giorgio Armani's Luminous Silk Foundation and I've been hooked. I haven't had a long term relationship with any foundation until Giorgio Armani came around. It's been OVER A YEAR now. This is kind of a big deal.

I've shared this products with a few of my close friends who have asked for make-up recommendations, and although the price can be scary, every single one of my girlfriends has come back and told me they L O V E it. So... you're welcome. See my everyday makeup routine HERE, where I use Giorgio Armani's foundation.

Happy Friday!
xo,
Sara

March 09, 2015

Three Vitamins for Better Skin You May Be Missing

No matter how experienced you are at applying make-up, beauty starts with healthy skin. The health of your skin begins with what you’re feeding your body. The top layer of your skin consists of dead skin cells that are constantly being replaced by new ones. It’s important that these new skin cells are getting the right vitamins, minerals, and hydration they need to create a healthy completion. Below are three vitamins essential for young, radiant skin.

Vitamin A. Helps skin rebuild tissues, therefore increasing your skin turnover. This vitamin is great for healing wounds or scars. Additionally, it helps your skin look and act younger by reducing wrinkles and fading brown spots.
        Found in: leafy greens, carrots, pumpkins, liver, sweet potatoes, squash, apricots, cantaloupe  

*Mend's Fully Loaded

Vitamin C. Stimulates the production of collagen in your skin. Collagen is the protein that gives your skin a young, elastic feel.
        Found in: citrus fruits, broccoli, peppers, berries, tomatoes, leafy greens, berries 


*Mend's Amped OJ

Vitamin E. Protects, repairs, and maintains healthy skin tissue.
        Found in: almonds, vegetable oil, olives, sunflower seeds, peanuts, spinach, avocados 

*Mend's Almond Milk


February 26, 2015

8 step guide to the perfect look (part 2 of 2)


**View Part One HERE**

5. BRONZER
Picking out the right shade….
Bronzer is every girl’s best friend because it helps add warmth to your face and make you look less tired. Picking the right shade is relatively easy because it does not have to be your exact skin color. When I shop for bronzers, I try avoiding powders that have any shimmer or tint of orange.

Application…
Using a large powder brush, apply bronzer where the sun naturally hits your face (i.e. cheeks, nose, forehead, and chin). Don’t forget to brush bronzer on your neck and chest as well.


6. BLUSH
Picking out the right color…
Choosing blush colors are fun because there is a wide range of colors to choose from. There will be multiple colors that will look great on your skin, and each one will create a different feel/look. Play around and see which colors work best for your skin tone.

Application…
Using a blush brush (smaller than a large powder brush, yet larger than any eye shadow brushes), apply a touch of blush to the apples of your cheeks. Blend outward, (toward hairline) to soften.


7. BROWS
I’m all about bold brows. Defined eyebrows will frame your face and define your eyes. 

Application…
Fill in your natural eyebrow with a pressed powder, making sure to fill any gaps or thin areas. After, blend it in to give it a smooth, natural finish. If desired, coat with clear eyebrow gloss to keep eyebrows in place throughout the day.


8. LIPS
Picking out the right shade…
There is a lot of freedom when it comes to picking out a lipstick color. The color and consistency can be played with to create anything from a natural, matte lip to a bold, glossy lip. Have fun experimenting with what colors look best with your skin tone!

Application…
Focus on applying color to the center of your lips, and then blend outward to your natural lip line. Be sure to avoid tracing the outer corners of your lips—this will make you look like a clown. If you have thin lips, outline your lips with lip liner beforehand.  


Currently Using...


Thanks for reading!!

Images by Lizzy Pinckney
Related Posts Plugin for WordPress, Blogger...